Showing posts with label Translations. Show all posts

Sunday, November 7, 2010

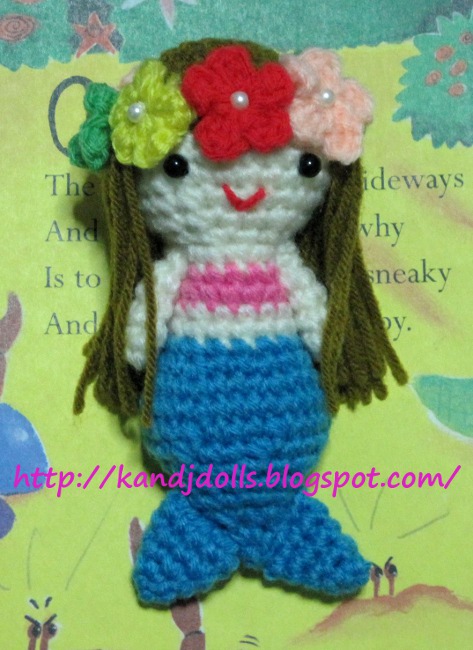
Little Mermaid, free Amigurumi crochet pattern


K and J Dolls
Pattern designed by Sayjai
This English pattern is also available in German.

© 2010 Sayjai / K and J Dolls, All rights reserved. This pattern cannot be published on another website or blog. Please respect my copyright. 

Little Mermaid

This pattern can be made using any yarn you wish. Choose a hook size that matches the yarn. 

I have used:
  • 3.00 mm hook
  • 4 ply yarn (cream, blue, pink, brown, red, green, peach and yellow)
  • Polyester fiberfill
  • Two 4 mm black beads for eyes or other eyes as desired
  • Eight 3 mm white beads for decorate the flowers
  • Tapestry needle
  • Sewing needle and thread for attaching eyes and white beads to flowers

Size: Little Mermaid is 4.5 inches/ 11.5 cm high

Abbreviations:
ch = chain
sc = single crochet
st = stitch
sl = slip
rnd = round
tog = together
dc = double crochet

Note: This project is working in continuous rounds, do not join or turn unless otherwise stated. Mark first stitch of each round. 

Head and Body: 
Rnd 1: With brown, ch 2, 6 sc in second chain from hook. (6)
Rnd 2: 2 sc in each st around. (12)
Rnd 3: (Sc in next st, 2 sc in next st) around. (18) 
Rnd 4: (Sc in next 2 sts, 2 sc in next st) around. (24)
Rnd 5: (Sc in next 7 sts, 2 sc in next st) around. (27)
Rnd 6: Sc in each st around, changing to cream in last 2 loops of last st. 
Rnd 7: Working in back loops only. Sc in each st around. 
Rnd 8: (Sc in next 8 sts, 2 sc in next st) around. (30)
Rnd 9: (Sc in next 8 sts, sc next 2 sts tog) around. (27)
Rnd 10: (Sc in next 7 sts, sc next 2 sts tog) around. (24)
Rnd 11: (Sc in next 2 sts, sc next 2 sts tog) around. (18)
Rnd 12: (Sc in next st, sc next 2 sts tog) around. (12)
Rnd 13: (Sc in next st, 2 sc in next st) around, changing to pink in last 2 loops of last st. (18)
Rnd 14: Sc in each st around. 
Rnd 15: Sc in each st around, changing to cream in last 2 loops of last st. 
Rnd 16: Sc in next 4 sts, sc next 2 sts tog, sc in next 7 sts, sc next 2 sts tog, sc in next 3 sts. (16)
Rnd 17: Sc in each st around, changing to blue in last 2 loops of last st.
Rnd 18: Sc in next 4 sts, 2 sc next st, sc in next 7 sts, 2 sc in next st, sc in next 3 sts. (18)
Rnd 19: (Sc in next 2 sts, 2 sc in next st) around. (24)
Rnd 20: (Sc in next 3 sts, 2 sc in next st) around. (30)
Rnd 21: Sc in each st around. 
Rnd 22: (Sc in next 3 sts, sc next 2 sts tog) around. (24)
Rnd 23: (Sc in next 2 sts, sc next 2 sts tog) around. (18)
Rnd 24: (Sc in next st, sc next 2 sts tog) around. (12)
Rnd 25-26: Sc in each st around. 
Rnd 27: Sc next 2 sts tog around. (6)
Rnd 28: Sc next 2 sts tog around, sl st in first st, fasten off. (3)


Tail (make 2):
Rnd 1: With blue, ch 2, 4 sc in second chain from hook. (4)
Rnd 2: (Sc in next st, 2 sc in next st) around. (6)
Rnd 3: (Sc in next 2 sts, 2 sc in next st) around. (8)
Rnd 4: (Sc in next 3 sts, 2 sc in next st) around. (10)
Rnd 5: Sc in each st around, sl st in first st. Leave long end for sewing, fasten off.

Sew the opening close flat.

Sew tails on rnd 26-28 of body.


Arm (make 2):
Rnd 1: With cream, ch 2, 6 sc in second chain from hook. (6)
Rnd 2-5: Sc in each st around.
Rnd 6: Sc in each st around, sl st in first st. Fasten off.

Sew arms to body.

Hair:
Cut 34 pieces of brown 5“ long yarn (15 cm). Hold two strands of yarn, fold in half. With top of the head facing, insert hook toward outer of head in free loops on rnd 6, draw the folded end through the stitch and pull the loose ends through the folded end, draw the knot up tightly. Add fringe from one side of head to the back of head and from here to the other side of head. Do not add fringe in the front (10 sts). 
Flower (make 8)

With red, ch 3, dc in first chain, ch 2, sl st in first ch, (ch 2, dc in first ch, ch 2, sl st in first ch) 4 times. Leave long end for sewing, fasten off.

Sew the flowers around the head.

Finishing:
Sew eyes 6 sts apart between rnds 8-9 of head. With red embroider mouth. 


On FlickR is a group where you can show pictures of your finished doll:  http://www.flickr.com/groups/kandjdolls/

Copyright 2010 Sayjai of K and J Dolls. All rights reserved. May not be reproduced or published in any form. You cannot publish this pattern on your blog or website. You are not allowed to sell this pattern. You are not allowed to alter this pattern in any way. This pattern is provided to you freely for personal use only. Please support independent designers and respect my copyright.


Tuesday, June 22, 2010

Saturday, June 12, 2010

Red Devil, Free Amigurumi pattern

This little Red Devil is designed by Mrsdevil. The Thai pattern is published on her blog. (madewithlove.bloggang.com)

I have translated it with permission into English.

Click here to download the free English Red Devil PDF Amigurumi pattern.


This pattern is also available in the following languages:

If you have a e-reader like a Kindle, iPad, Sony E-Reader or a Nook: you can download the pattern for your e-reader on Smashwords.com.

Saturday, February 13, 2010

Tiny Kitty: Free pattern

Pattern designed by Jaimai and translated by Sayjai (K and J Dolls).


Many thanks to Jaimai for being so kind to allow me to translate Tiny Kitty. Jaimai's Thai blog: jaimai.bloggang.com

Materials: 
  • 3.00 mm hook
  • 4 ply yarn (white, pink, blue, black and yellow)
  • Polyester fiberfill
  • Tapestry needle
  • Black embroidery floss
Update: Unfortunately this pattern is no longer available in English or German. Legal representatives of Sanrio claimed it looks like Hello Kitty. 

This pattern is perhaps still  available in:
- Portuguese (Português) (This translation is on the blog of Erika)
- Dutch (Nederlands) (This translation on the blog of Charlotte)


Samantha (SykoSam on Ravelry) made this beautiful Kitty:


She made the dress longer: she added 3 rows to it. The flower was a magic circle of 6 sc, then ch2, 3dc, 2ch, sl st into each st.

Erika (erikatricoche.blogspot.com) made this Hello Kitty:


~ Sayjai ~

Thursday, February 11, 2010

Blue Donkey: free Amigurumi crochet pattern

Pattern designed by Jaimai, Translated by Sayjai (K and  Dolls)


Sayjai's English blog: kandjdolls.blogspot.com
Jaimai's Thai blog: jaimai.bloggang.com

This pattern is also available as PDF file: blue donkey free amigurumi pattern.pdf

Available translations: German

Materials:
1) 3.00 mm hook
2) 4 ply yarn (cream, pink, white and blue)
3) Polyester fiberfill
4) Tapestry needle
5) Black embroidery floss

Abbreviations:
ch = chain
sc = single crochet
st = stitch
sl = slip
rnd = round
tog = together

Note:This project is working in rows; the rows start with chain one and join with slip stitch at the end of row. Mark first stitch of each row.

Head:

Row 1: With cream, ch 4, 2 sc in second ch from hook, sc in next ch, 4 sc in next ch; working in remaining loops on opposite side of ch, sc in next ch, 2 sc in next ch, sl st in first st. (10)
Row 2: Ch 1, (2 sc in next st) 2 times, sc in next st, (2 sc in next st) 4 times, sc in next st, (2 sc in next st) 2 times, sl st in first st. (18)
Row 3: Ch 1, (sc in next st, 2 sc in next st) 2 times, sc in next st, (sc in next st, 2 sc in next st) 4 times, sc in next st, (sc in next st, 2 sc in next st) 2 times, sl st in first st. (26)
Row 4-6: Ch 1, sc in each st around, sl st in first st, fasten off.
Row 7: With blue, ch 1, sc in next 2 sts, sc next 2 sts tog, sc in next 6 sts, sc next 2 sts tog, sc in next 3 sts, sc next 2 sts tog, sc in next 6 sts, sc next 2 sts tog, sc in next st, sl st in first st. (22)
Row 8-9: Ch 1, sc in each st around, sl st in first st.
Row 10: Ch 1, sc in next 2 sts, sc next 2 sts tog, sc in next 5 sts, sc next 2 sts tog, sc in next 2 sts, sc next 2 sts tog, sc in next 5 sts, sc next 2 sts tog, sl st in first st. (18)
Row 11-12: Ch 1, sc in each st around, sl st in first st.
Row 13: Ch 1, sc in next 2 sts, sc next 2 sts tog, sc in next 3 sts, sc next 2 sts tog, sc in next 2 sts, sc next 2 sts tog, sc in next 3 sts, sc next 2 sts tog, sl st in first st. (14)
Row 14: Ch 1, sc in each st around, sl st in first st. Stuff.
Row 15: Ch 1, (sc next 2 sts tog, sc in next st) 4 times, sc next 2 sts tog, sl st in first st. (9)
Row 16: Ch 1, (sc next 2 sts tog) 4 times, sc in next st, sl st in first st, fasten off. (5)

Ear (make 2):
Use blue color for the parts written in blue and use pink color for the parts written in pink.
Row 1: Ch 2, 3 sc in second ch from hook, 3 sc in same ch, sl st in first st. (6)
Row 2: Ch 1, sc in next 3 stssc in next 3 sts, sl st in first st. (6)
Row 3: Ch 1, 2 sc in next st, sc in next st, 2 sc in next st, sc in next st, 2 sc in next st, sc in next st, sl st in first st. (9)
Row 4: Ch 1, sc in next st, 2 sc in next st, sc in next 2 sts, 2sc in next st, sc in next 2 sts, 2sc in next st, sc in next st, sl st in first st. (12)
Row 5: Ch 1, sc in next 7 sts, sc in next 5 sts, sl st in first st.
Row 6: Ch 1, sc in next st, 2 sc in next st, sc in next 3 sts, 2 sc in next st, sc in next st, sc in next 2 sts, 2 sc in next st, sc in next 2 sts, sl st in first st. (15)
Row 7: Ch 1, sc in next 9 sts, sc in next 6 sts, sl st in first st. (15)
Row 8: Ch 1, sc in next st, sc next 2 sts tog, sc in next 3 sts, sc next 2 sts tog, sc in next st, sc in next 2 sts, sc next 2 sts tog, sc in next 2 sts, sl st in first st. (12)
Row 9: Ch 1, sc in next st, sc next 2 sts tog, sc in next 2 sts, sc next 2 sts tog, sc in next 2 sts, sc next 2 sts tog, sc in next st, sl st in first st. (9)
Row 10: Ch 1, sc in next 5 sts, sc in next 4 sts, sl st in first st. (9)
Row 11: Ch 1, sc in next st, sc next 2 sts tog, sc in next 2 sts, (sc next 2 sts tog) 2 times, sl st in first st. (6)
Row 12: Ch 1, sc in next 4 sts, sc next 2 sts tog, sl st in first st. (5)
Row 13: Ch 1, sc in next 5 sts, sl st in first st. (5)

Sew ears on head.

Eye (make 2):

Row 1: With white, ch 3, 2 sc in second ch from hook, 3 sc in next ch; working in remaining loops on opposite side of ch, sc in next ch, sl st in first st, fasten off. (6)

With Black embroidery floss, embroider pupils on white eyes. Sew eyes on head. With blue, embroider eyelids. With black, embroider hairs and brush them.


(Note of translator: In my own K and J Dolls patterns I describe with text and pictures how to do the hair. This is a translation and I did not want to alter the original design. E-mail me if you have questions about the hair.)  

Copyright 2010 pattern and design: Jaimai, All rights reserved. Copyright 2010 translation from Thai into English and of the English text: Sayjai Thawornsupacharoen, All rights reserved. English pattern first published on the blog of K and J Dolls (kandjdolls.blogspot.com) with permission of designer. This pattern may not be published, distributed, altered, put on other websites or translated without explicit written permission of Jaimai and Sayjai.

Monday, January 25, 2010

Patterns translated into German

This week some of my patterns will be published in German. For this reason a German blog is started:

Sunday, January 24, 2010

Dolls with cute duck, bunny, frog, bear and piggy cap

Finally a new pattern is finished. It's very Japanese and cute. The pattern is sold in my shop: kandjdolls.etsy.com . It is available in English (using U.S. crochet terms) and German. Soon I will release a new free amigurumi pattern.
Japanese little Amigurumi dolls: duck, frog, pig, bunny and bear
Fluffy Babies: Small Amigurumi Japanese dolls with cap

Tuesday, January 5, 2010

Translate my Free Patterns

Hi All

If you like to translate my free patterns to Swedish, German, Spanish or French: go ahead. It's an honour for me! Please ask permission first (kandjdolls@gmail.com) Also keep the copyright notice and add a link to my Blog at the top in bold (kandjdolls.blogspot.com).

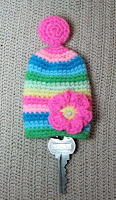
This only applies to the 5 free crochet patterns: the Gift Bag, Pink Rabbit Monster Witch and Key Cozy, .....


~ Sayjai ~

Friday, January 1, 2010

Sunday, December 27, 2009

Pippi Longstocking

Today I finished my Pippi Longstocking doll. The pattern is almost finished and will be available soon on kandjdolls.etsy.com

Saturday, December 19, 2009

Wednesday, September 30, 2009

Bride and Groom PDF Pattern

Bride and Groom, Amigurumi, Crochet Pattern

Bride and Groom, Amigurumi, Crochet Pattern

My friend in London is getting married Saturday September 30th. This cute couple I made for her.
If you like to make it too: they are sold on kandjdolls.etsy.com

Saturday, September 26, 2009

New Amigurumi Doll

The ones who follow my blog know I churn out a new amigurumi every week. This week is an exception: did not finish her yet. Am trying different hairstyles and did not get the arms right. She will be finished October 1st hopefully.

Here is a teaser preview:
Click to see larger picture in new window
I apologize for showing her back only. Once she is finished I post all pictures.

Wednesday, September 9, 2009

Free pattern: "Pink Rabbit Monster" Finished

free amigurumi crochet patternfree amigurumi crochet pattern


A German translation is available on my German Blog and a Swedish translation is available on Cissi's Swedish Amigurumi Blog.

Pattern for the Pink Rabbit Monster Witch

For halloween I added a hat and broomstick.

This pattern can be made using any yarn you wish. Choose a hook size that matches the yarn

Materials:
I have used :
3.00 mm hook
4 ply yarn (Light pink, dark pink for inner ear, Red and green for hat)
Polyester fiber
Black 10 mm buttons for eyes or other eyes as desired
Tapestry needle
Sewing needle and thread for attaching eyes
Iron Wire 7 inches


Size: 6 inches tall

Abbreviations:
ch = chain
sc = single crochet
st = stitch
sl = slip
rnd = round
tog = together
hdc = half double crochet
dc = double crochet

Note: This project is working in continuous rounds, do not join or turn
unless otherwise stated. Mark first stitch of each round.

Head and Body:

Starting at the bottom of the body.

Rnd 1: With light pink, ch 2, 6 sc in second chain from hook. (6 sc made)
Rnd 2: 2 sc in each st around. (12)
Rnd 3: (Sc in next st, 2 sc in next st) around. (18)
Rnd 4: (2 sc in next st, sc in next 2 sts) around. (24)
Rnd 5: Sc in next 2 sts, 2 sc in next st, (sc in next 3 sts,
2 sc in next st) 5 times, sc in next st. (30)
Rnd 6: (Sc in next 4 sts,2 sc in next st) around.(36)
Rnd 7: (2 sc in next st, sc in next 5 sts) around. (42)
Rnd 8: Sc in next 3 sts, 2 sc in next st, (sc in next 6 sts,
2 sc in next st) 5 times, sc in next 3 sts. (48)
Rnd 9: Sc in each st around.
Rnd 10: (Sc in next 7 sts, 2 sc in next st) around. (54)
Rnd 11: Sc in each st around.
Rnd 12: Sc in next 4 sts, 2 sc in next st, (sc in next 8 sts,
2 sc in next st) 5 times, sc in next 4 sts. (60)
Rnd 13-20: Sc in each st around.
Rnd 21: (Sc in next 8 sts, sc next 2sts tog) around. (54)
Rnd 22: Sc in each st around.
Rnd 23: (Sc in next 7 sts, sc next 2 sts tog) around. (48)
Rnd 24: Sc in each st around.
Rnd 25: (Sc in next 6 sts, sc next 2 sts tog) around. (42)
Rnd 26: Sc in each st around.
Rnd 27: (Sc in next 5 sts, sc next 2 sts tog) around. (36)
Rnd 28: Sc in each st around. Stuff.
Rnd 29: (Sc in next 4 sts, sc next 2 sts tog) around. (30)
Rnd 30: (Sc in next 3 sts, sc next 2 sts tog) around. (24)
Rnd 31-36: Sc in each st around.
Rnd 37: (Sc in next 2 sts, sc next 2 sts tog) around. Stuff. (18)
Rnd 38: (Sc in next st, sc next 2 sts tog) around. (12)
Rnd 39: (Sc next 2 sts tog) around, join with sl st in first st.
Fasten off.

Foot (make 2):

Rnd 1: With light pink, ch 2, 6 sc in second chain from hook. (6 sc made)
Rnd 2: 2 sc in each st around. (12)
Rnd 3: (Sc in next st, 2 sc in next st) around. (18)
Rnd 4-12: Sc in each st around. Stuff.
Rnd 13: For first toe, sc in next 3 sts, skip next 12 sts,
sc in next 3 sts. (6)
Rnd 14: Sc in each st around.
Rnd 15: (Sc next 2 sts tog) around, join with sl st in first st.
Fasten off.
Rnd 13: For second toe, join light pink to next free st on rnd 12, ch 1,
sc in same st, sc in each of next 2 sts, skip next 6 sts,
sc in last 3 sts. (6)
Rnd 14-15: Repeat rnds 14-15 of first toe.
Rnd 13: For third toe, join light pink to next free st on rnd 12, ch 1,
sc in same st, sc in next 5 sts. (6)
Rnd 14-15: Repeat rnds 14-15 of first toe.

Sew foots to bottom of body.

Ear (make 2 light pink, 2 dark pink):

Row 1: Ch 10, sc in second chain from hook, hdc in next 2 chs,
dc in next 3 chs, hdc in next 2 chs, sc in next ch. Fasten off. (9)

Matching sts, hold 1 light pink ear and 1 dark pink ear tog, with dark pink side facing you. Join light pink with sl st at end of row 1, ch 1, sc in same st, sc in next 7 sts, (2 sc in next st) 2 times, sc in next 8 sts. Fasten off.

Sew ears to side of head on rnd 37.

Arm (make 2):

Rnd 1: With light pink, ch 2, 6 sc in second chain from hook. (6)
Rnd 2-8: Sc in each st around.
Rnd 9: 2 sc in each st around. (12)
Rnd 10-12: Sc in each st around. Stuff.
Rnd 13: Sc next 2 sts tog around. Fasten off. Sew opening closed. (6)

Sew arms to side of body over rnd 23-24.

Hat:

Rnd 1: With red, ch 2, 6 sc in second chain from hook. (6)
Rnd 2: Sc in each st around.
Rnd 3: (2 sc in next st, sc in next st) around. (9)
Rnd 4: (Sc in next 2 sts, 2 sc in next st) around. (12)
Rnd 5: (Sc in next 3 sts, 2 sc in next st) around. (15)
Rnd 6: Working in front loops only. Ch 1, reverse sc in each st around,
join with sl st in first st. Fasten off.

***Reverse sc is working from left to right, insert hook in next st to the right and complete as sc.***

Pom-pom: Wrap green around cardboard 20 times, slide loops off cardboard; tie separate strand around middle of all loops. Cut loops, trim; sew to end of hat.

Sew hat on top of head.

Witch hat (pink):

Rnd 1: With pink, ch 2, 6 sc in second chain from hook. (6)
Rnd 2: Sc in each st around.
Rnd 3: (Sc in next st, 2 sc in next st) around. (9)
Rnd 4: Sc in each st around.
Rnd 5: (2 sc in next st, sc in next 2 sts) around. (12)
Rnd 6-7: Sc in each st around.
Rnd 8: (2 sc in next st, sc in next 3 sts) around.(15)
Rnd 9: Sc in each st around.
Rnd 10:(Sc in next 4 sts, 2 sc in next st) around. (18)
Rnd 11: Sc in each st around.
Rnd 12: (Sc in next 5 sts, 2 sc in next st) around.(21)
Rnd 13-14: Sc in each st around.
Rnd 15: (Sc in next 6 sts, 2 sc in next st) around. (24)
Rnd 16: (For ear hole,Ch 3, skip 3 sts; sc in next 9 sts) 2 times.
Rnd 17: (Sc in next 3 sts, 2 sc in next st) around.(30)
Rnd 18: (Sc in next 4 sts, 2 sc in next st) around. (36)
Rnd 19: (Sc in next 5 sts, 2 sc in next st) around, join with sl st in first st. Fasten off.(42)

Sew hat on top of head.

Broom: With pink.

Part 1: Broomstick

Rnd 1: Ch 2, 6 sc in second chain from hook.(6)
Rnd 2: Working in back loops only. Sc in each st around.
Rnd 3-13: Sc in each st around, join with sl st in first st. Fasten off

Part 2 : Bristles

Cut 20 pieces of yarn, 6 inches in length. Fold the yarn in half and loop an iron wire around the center, and then twist the wire up together.

Assembly: Put the iron wire inside part 1, sew them together, tie a piece of yarn around the bristles, to make it look like a real straw broom. Trim the broom.

Finishing:

Sew eyes 3 sts apart over rnds 35-36 of head. With red, embroider mouth.


Copyright 2009 Sayjai Thawornsupacharoen. This is a free pattern. You are not allowed to sell this pattern. You are allowed to distribute this pattern and sell finished dolls based on this pattern, provided you add the following link and text:

The original pattern is available on the blog of K and J Dolls:
http://kandjdolls.blogspot.com/2009/09/free-pattern-pink-rabbit-monster.html

This work is licensed under the Creative Commons Attribution-Noncommercial-Share Alike 3.0 Unported License. To view a copy of this license, visit http://creativecommons.org/licenses/by-nc-sa/3.0/ or send a letter to Creative Commons, 171 Second Street, Suite 300, San Francisco, California, 94105, USA.

Keywords: crochet patron gratuit, Anleitung, Häkeln, free crochet pattern, lapin, conejo, Kaninchen