Monday, January 31, 2011

Penguin waddles

A small riot took place on my kitchen table this morning. A group of penguins was angrily waddling around the table begging for my attention. They complained that almost all my attention this month had gone to the newly arrived rabbit family, which made the penguins feel very neglected and ordinary.

They were right, they arrived before the rabbits but I still hadn't given them a special place in my store, I had forgotten all about them. Shame on me. But I do adore my sweet family of penguins, so to show them how special and unique I think they are, I'm devoting this post to them. I hope this makes up for abandoning them, at least a little...

Meet the gorgeous and glamorous family of penguins: Obie, Sam, Cleo, Reed and Lola. Please visit them and give them a hug, that'll make them feel so much better. Sometimes I just get so busy that I forget that my little creatures have feelings too and they all need to feel cherished. 

LOVE IT OR LIST IT - polling the audience

We are looking for your input on this one!

I've been working on this Craig's list night stand

and awefulizing over it.

I don't like it!
George likes it!
It's midnight black with gold accents.

Do you like it?
Do you love it?
Do you hate it?
Would you buy it?
Do you have a suggestion?
Plz tells us your thoughts.

UPDATE:
I hated it, so the re-revamp can be seen here:

... WALL HOOK TO DRAWER HANDLE ...

it's real pretty now!


Jacob has been treasured

Look at Jacob, he's already making friends with other bunnies in the Etsy universe.
I really like Etsy treasuries, and I used to have an ambition to make an Etsy treasury myself. I was dreaming up the most awesome and vivid color combinations, but I had to give up on that dream. I never got the chance, it was impossible for me to snatch up a treasury spot. I wonder how other Etsians do it, but I am glad they do and I'm very appreciative when they include one of my creatures.

The rabbit family


Meet the Rabbit family! Just in time for February, pfew...
I managed to sew 5 new rabbits while trying to ignore the pain in my wrist and arm... It's just too much fun to try out a new design in several new color combinations. And I'm never sure which one will be my favorite until I'm done sewing them. This time I wasn't too sure about the yellow rabbit, but she turned out to be my favorite.
Meet Jacob (made with embossed felt), Ava, Logan, Madison and of course the rabbit that started it all, Ella.

Liza Donnelly


Free heart crochet pattern for Valentine


Valentine is near! Below is an Instruction Video and an easy crochet pattern to make a little Heart.


Materials used: 3.00 mm hook and 4 ply or dk  yarn

Size: wide 1.8 inches/ 4.5 cm, high 1.5 inches/ 4 cm

Abbreviations: ch = chain, sc = single crochet, st = stitch, sl = slip, rnd = round, tog = together


Hump (make 2):
Rnd 1: With red, ch 2, 6 sc in second chain from hook. (6)
Rnd 2: 2 sc in each st around. (12)
Rnd 3: Sc in each st around.

For first hump, join with sl st in first st. Fasten off.
For second hump, do not sl st in first st. Do not fasten off.

Rnd 4: With the right side facing you, sc in st on first hump (mark first st), sc in next 11 sts on first hump, sc in  next 12 sts on second hump. (24)

Rnd 5: Sc in each st around. (24)
Rnd 6: (Sc in next 4 sts, sc next 2 sts tog) around. (20)
Rnd 7: (Sc in next 3 sts, sc next 2 sts tog) around. (16)
Rnd 8: (Sc in next 2 sts, sc next 2 sts tog) around. Stuff. (12)
Rnd 9: (Sc in next st, sc next 2 sts tog) around. (8)
Rnd 10: (Sc next 2 sts tog) around, join with sl st in first st. Fasten off.. (4)

Sew all openings close.
 
Copyright 2011 Sayjai. All rights reserved.

This is a free pattern for your personal use only. You are not allowed to sell this pattern. You are not allowed to distribute or publish this pattern in any form (this includes other blogs and websites). If you like visitors of your website to read this pattern: provide a link to this blog post but do not copy the pattern onto your site. Please respect the work of original designers. Thank you.

Sunday, January 30, 2011

Ringo the Monkey

Even though I've been a bit busy with my new rabbits this month, I really wanted to make a monkey with some of that new Japanese patterned felt. So I did!
I like cute felt animals in their regular colors, but I love them more in bold colors that would make no sense in nature. His tan skin is patterned with little white apples so I named him Ringo, which means apple in Japanese. You can visit him here.

DO UP YOUR BUTTONS - button tufting tutorial

My tools of destruction.
The dowel holding this wing secure was broke.
So it was repaired with a screw and some glue.
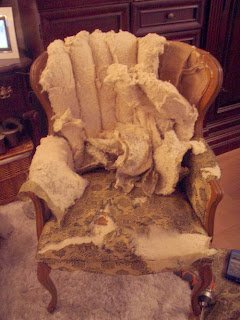
Time to make a pile of rubble.
New under pad on the seat and back.
I painted the frame then distress the frame.
I also antiqued it without pictures, my apologizes.
Cut a new piece of foam for the seat and
continued to upholster the seat and the arms.
Then upholster the front of the back
DO NOT UPHOLSTER THE BACK.
The trick to button tufting is to have something
solid at the back to secure the buttons to.
I relied on the wood uprights on this chair.
 Here are my nifty supplies and tools.
Upholstery buttons (used - keep everything right)
Green tape
Flexible wire
My homemade upholstery needle
*your needle must be sharp and strong*
 Recover the buttons with new fabric
I used the same fabric, you could choose a
complementary fabric.
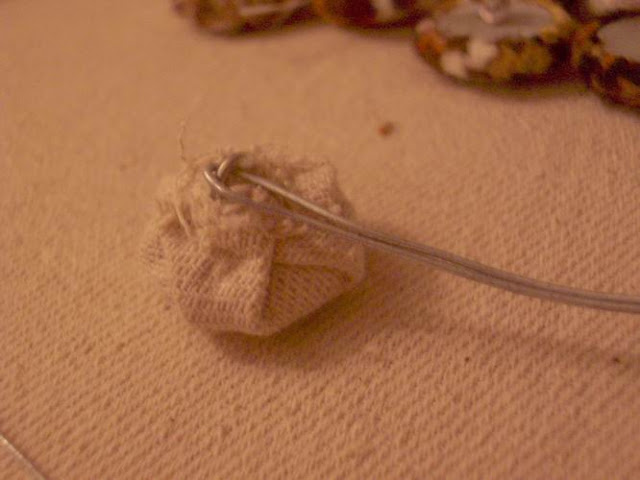
 Make sure the back loop is exposed.
 Cut your wire to approx. 12inch
 Thread your cut wire through the button loop.
 Using your large needle
skewer your upholstery from front to back.
With my SLEIGHBED
I had to start skewering at the back because
holes were already drilled in the wood.
Now tape the wire to the end of your needle.
DO NOT USE A LOT OF TAPE.
Try to keep the thickness as thin as possible to get it
through the layers of fabrics smoothly or else it will
get caught up and the wire will seperate from the needle.
You want to get it thru the first time, everytime.

Now gently pull and wiggle the needle and wire through.
Once thru remove the needle and push the button
firmly into your upholster to a desired depth and twist
your wire at the back. (an extra thumb is helpful to push)
Oh George !!! ......
If you were working with upholstery that was already tufted
there would be something in place to tie the wire to.
For 2 of these buttons I wrapped it around the wood
frame then tucked it safely out of the way.

For the lower 2 buttons,
I used 3 staples to secure the wire to the wood.
My PARLOUR chair
had ridged burlap (like it was painted with glue) running from
side to side that the wire poked thru then twisted
around small nails. The burlap seen in this chair
was too soft and flexible to use that way.

Once you have all your buttons in place and secured,
finish upholstering the back of your new furniture.
I prefer the look of only 4 buttons with this piece.
You can do as many as you like.


If I missed anything plz ask.

For an indepth upholstery tutorial on a slipper chair
plz check out GINA's
ongoing upholstery chronicles:

 
I've shared this tutorial at:
Designer Garden