
Yesterday I was asked about many of the items used on my mantle.

And did I have tutorials on some of the items.
This morning I bring you the first of several Christmas tutorials:
SHEET MUSIC TREE ORNAMENTS

You will need:
Hot glue gun & glue
Scissors
A sheet of music
Glitter
White glue
String
2 plates
2 center decorations (Santa graphic)

Take your sheet music and cut it to the size you want your finished ornament to be.

Above is an example of the size I did compared to the page of the sheet music.
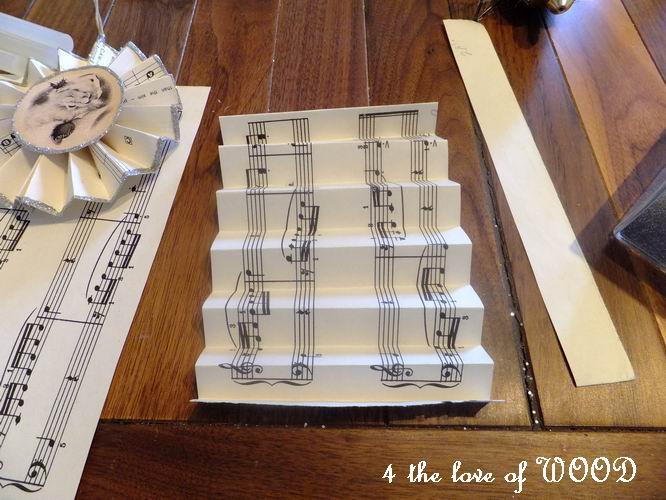
Accordion your cut piece.
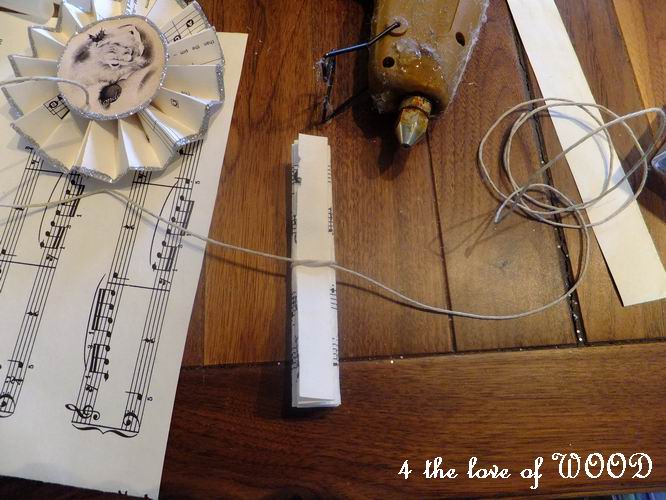
Tie your tightly folded accordion section in the middle with your hanging string.

Fold in half length wise and hide the string where you glue it together with your glue gun.

Now glue the other side and press the edges together forming a full circle.

Tie off your string and trim the length.

Now to the glitter part and the center decoration.
I've used a graphic printed from the computer with a vintage Santa image.
You could use many things such as: parts of old greeting cards, gift tags, or
even type out a tag saying:
TO:
FROM:
and use it as a gift tag

This is my glue plate pictured below.
You need to have a good amount of white glue to dip your parts in.

Have your glitter ready for dipping also.

Between your fingers roll your decoration in your glue, coating the edges.


Move to your glitter and roll your decoration there next.

Set it aside to dry.

Repeat the steps for the second decoration.

1 for the front and 1 for the back.
You can also do different pictures front and back for a different look
depending what side you want to show.

Now you do the same thing with the sheet music fan circle.

Roll the edge in your glue

Then in your glitter.

Now hot glue your ornaments in the centers,
1 side then the other.

Hang your Sheet Music Ornament and enjoy

No comments:
Post a Comment