I've brought together all the information from several posts on
how I transfer graphics onto painted furniture.

This graphic is a fabulous vintage chocolate label found on line.


Once she was done this is how she looked.


This is how he turned out

So now to the how can I do that part.
The chocolate label was already a computer graphic and can be found here:
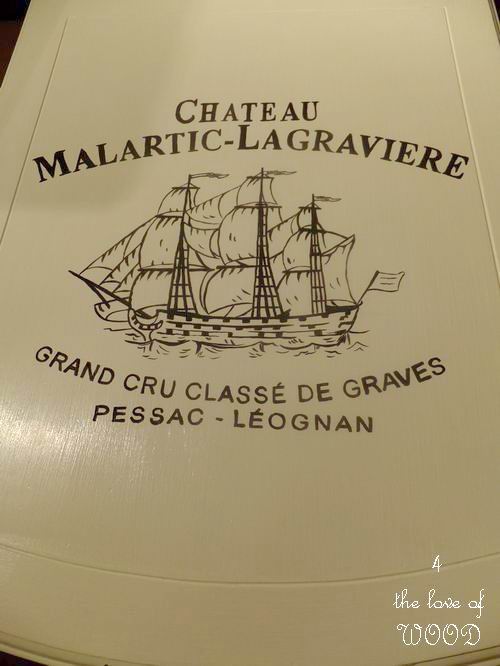
but the wine graphic had to be scanned and put into a usable format on the computer.
I chopped up the wine graphic to fit this table better.
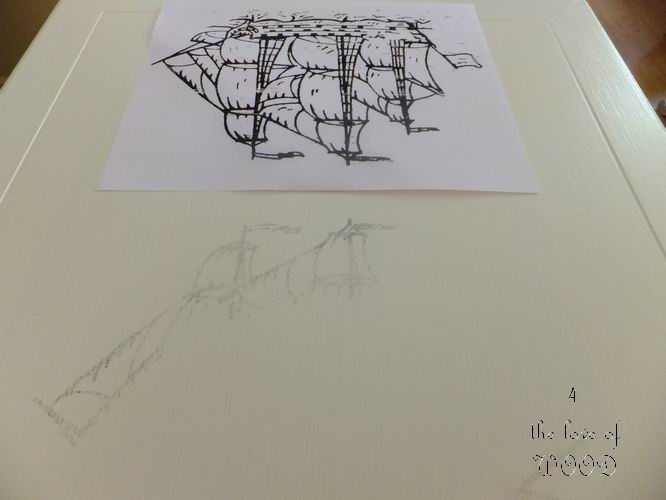
I also blow up the ship to make a better visual statement.


You are only limited by your imagination!
I reverse the image on the computer before printing it out in sections on regular white paper to get the size I want for the table surface

Then tape any sections together that need to be lined up.
I use an HP office ink jet printer.
Place your paper face down where you want the image transferred
These transfers were done on WHITE PRIMER.

Use a single piece of tape to keep your paper in place and act as a hinge so you can peek at the transfer.
Then burnished the back side so the ink starts to transfer onto the primed table top.
Then burnished the back side so the ink starts to transfer onto the primed table top.
The harder you rub the better the transfer.

Flip your image up to periodically check how things are going.
This is not permanent, so please be delicate with the transferred ink.
Like newsprint the ink transferred on the surface can smear,
get on your hands and fingers and then on everything else around you.
get on your hands and fingers and then on everything else around you.


You can choose at this point to clearcoat the transfer as is
or take a few more steps to paint it as I did.
Because this is done on a PRIMED surface I give it a clear coat so
I can still use a final PAINTED finish on top.
or take a few more steps to paint it as I did.
Because this is done on a PRIMED surface I give it a clear coat so
I can still use a final PAINTED finish on top.
Take your transfer out doors and holding your can of clear coat approx.
2 feet above lightly dust a layer over the transfer to protect it.
2 feet above lightly dust a layer over the transfer to protect it.

Next brush on a thin coat of primer to adhere to the clear coat
(because I used an oil base clearcoat)
followed by a thin coat of finish paint,
(because I used an oil base clearcoat)
followed by a thin coat of finish paint,
Yes right over your graphic.

The image still shows thru these thin layers of primer and paint,
and this gives you the finished white surface.
and this gives you the finished white surface.
Grab your artist brush, craft paint, and if possible a steady hand.


2 hours and a TV movie later and your hand painted image is done.
Now you can give it a final clear coat to protect your finished masterpiece.
No comments:
Post a Comment